

Download and install MoonPay
Fill in all appropriate information to confirm identity
You did setup your Exodus wallet already right? If not please go here first Setup Exodus
Wait for funds to arrive in Exodus
FInally, with our desired crypto in hand and gas in the tank, we will send our crypto to the vendor wallet
The first step in the process will be downloading and installing the MoonPay app on your mobile device
Once your MoonPay is verified we will purchase our crypto. Since we know our vendor accepts Solana we will keep our entire purchase in Sol for payment and gas fees
KYC, or “Know Your Customer,” is a standard process crypto exchanges use to verify your identity. It usually involves submitting a photo ID and a selfie, and sometimes proof of address. While it might feel like a hassle, KYC helps prevent fraud, keeps the platform secure, and ensures compliance with financial regulations—so this will be required regardless of platform. You must complete verification with an exchange before you can begin trading.
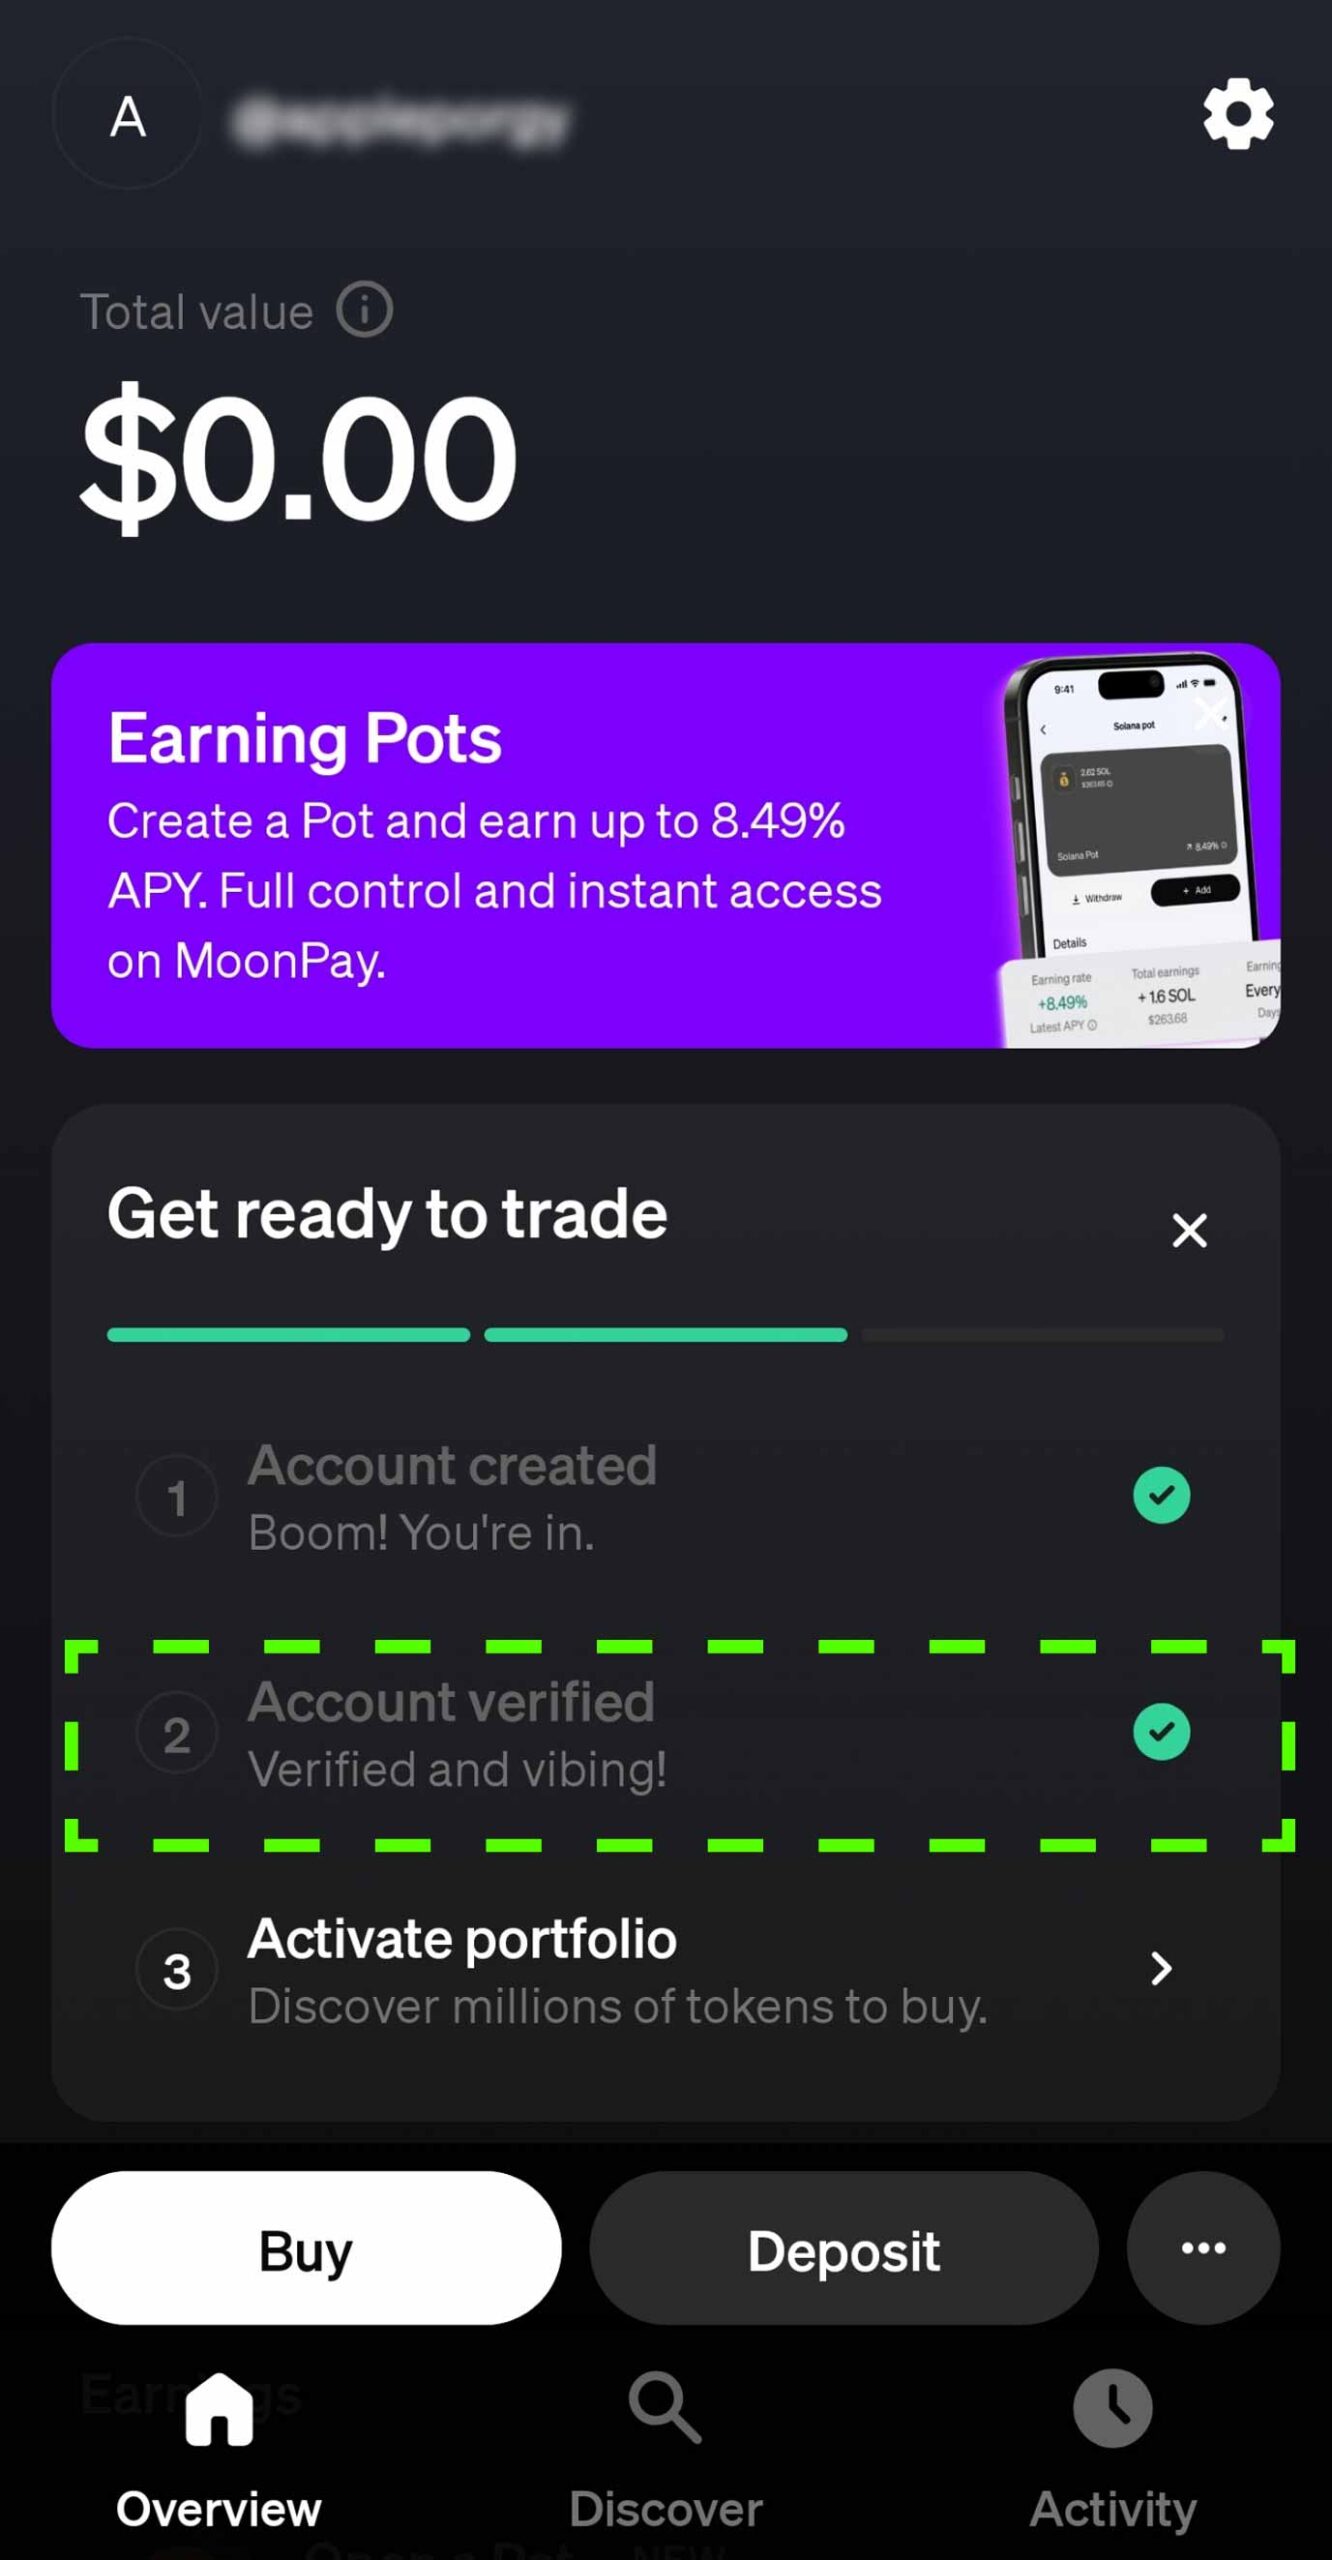
1) Make sure your account is listed as verified before proceeding. Then click Buy.
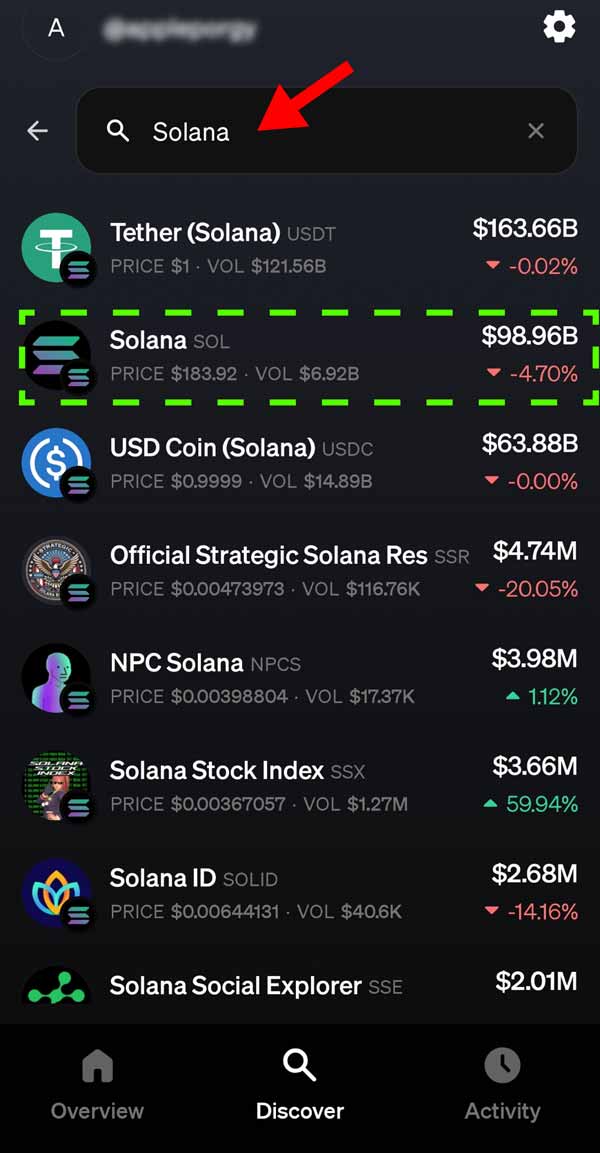
2) Search for Solana and select it from the options that appear.
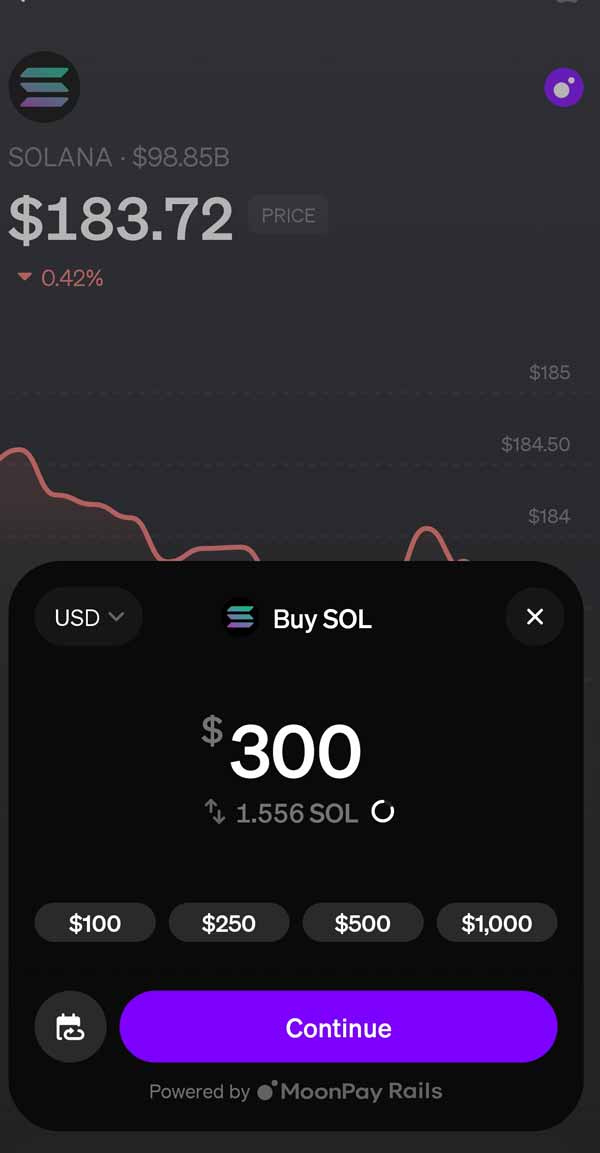
3) Enter in how much you wish to spend but add $10 to the total to accommodate for price fluctuations and gas fees
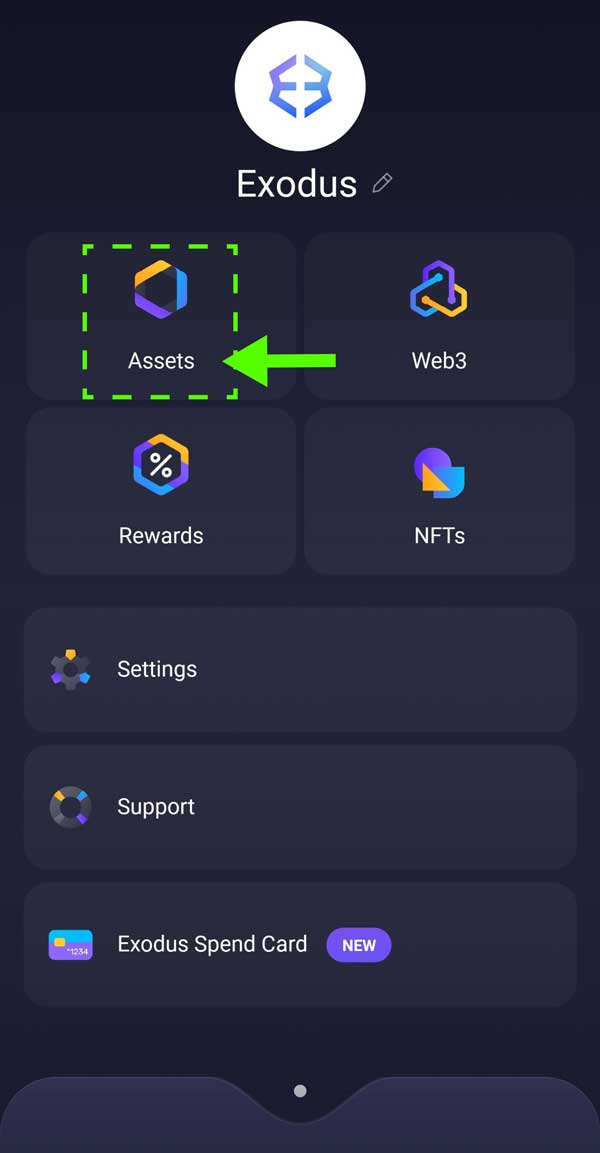
4) We will need to send to to our exodus wallet so return to your wallet so we can get your Solana wallet address. From Exodus menu choose Assets
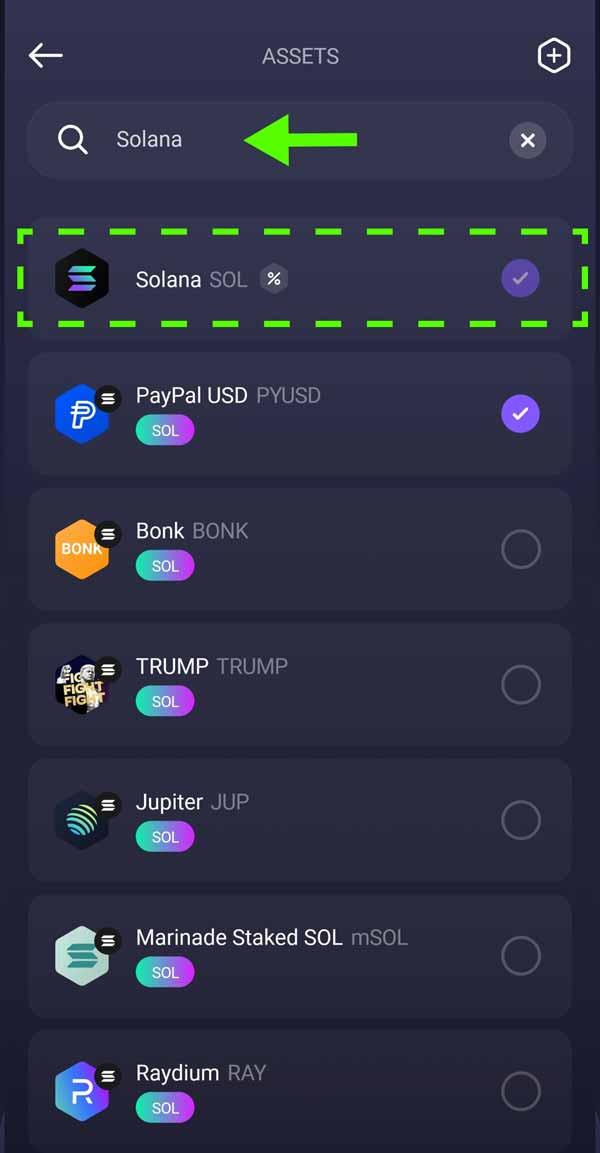
5) Search for Solana and select it from the options that appear
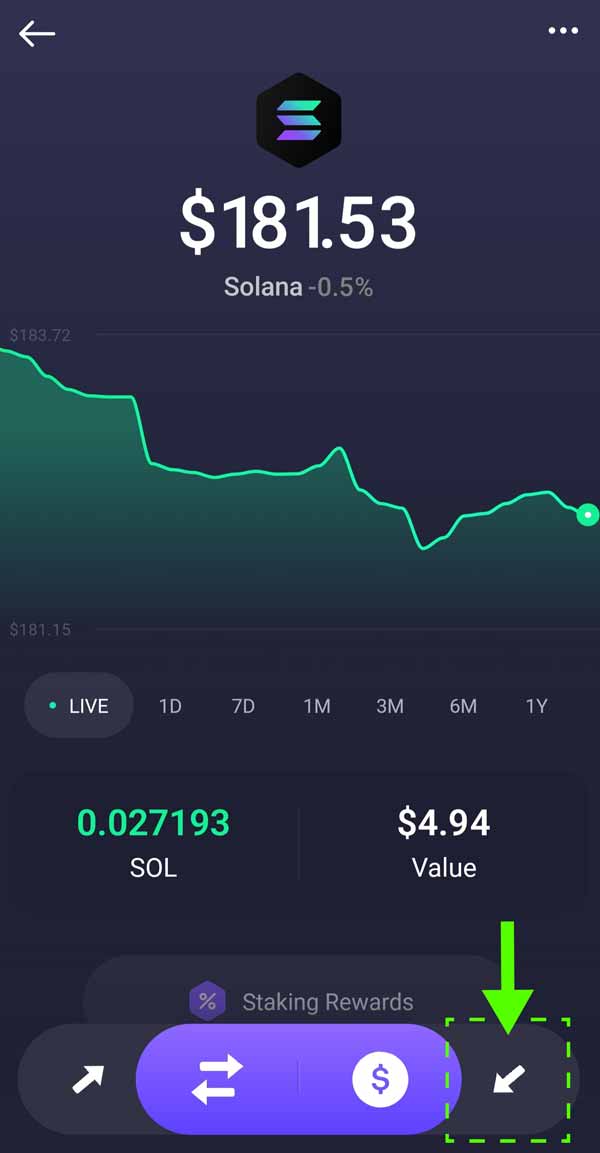
6) Select the receive icon in bottom right
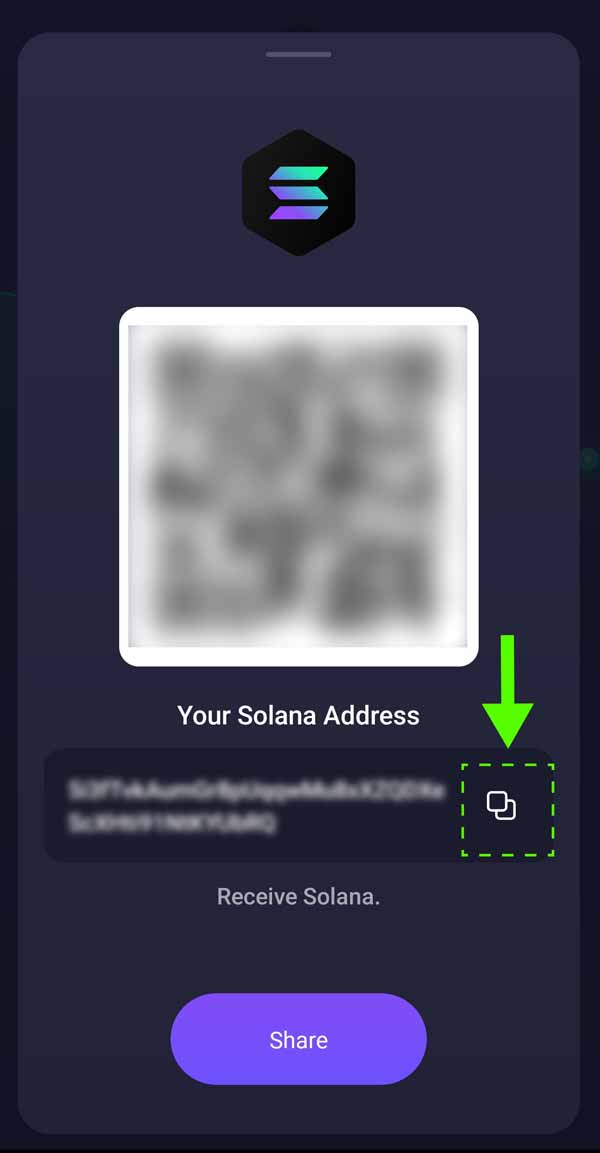
7) Using the icon next to your wallet address, click it to copy the address
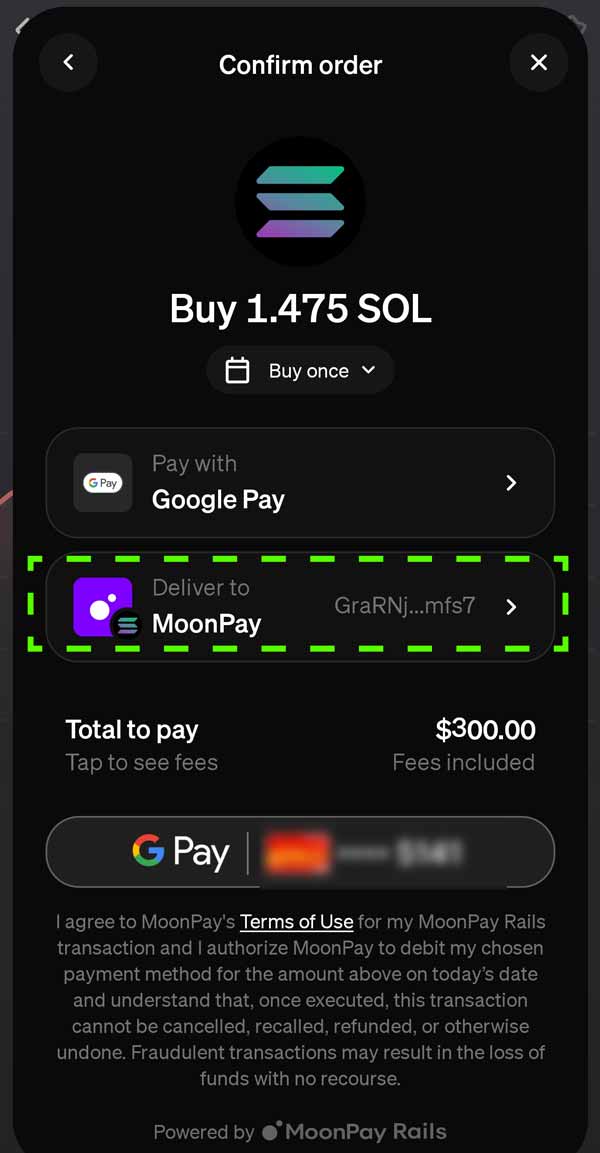
8) Select the Deliver To Option
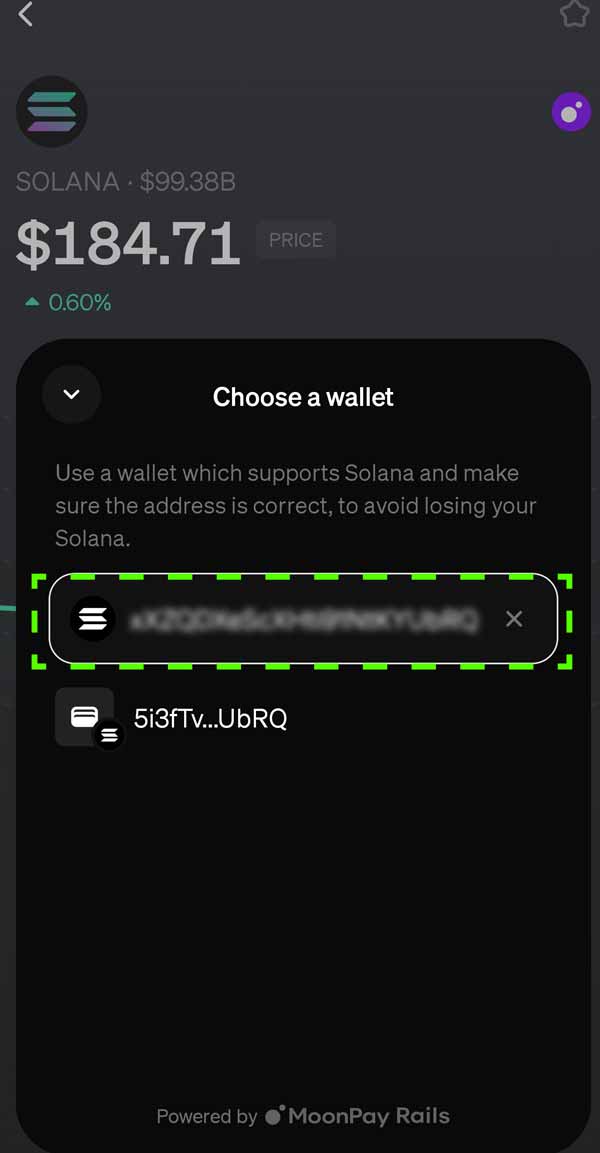
9) Paste your Solana wallet address into the address bar
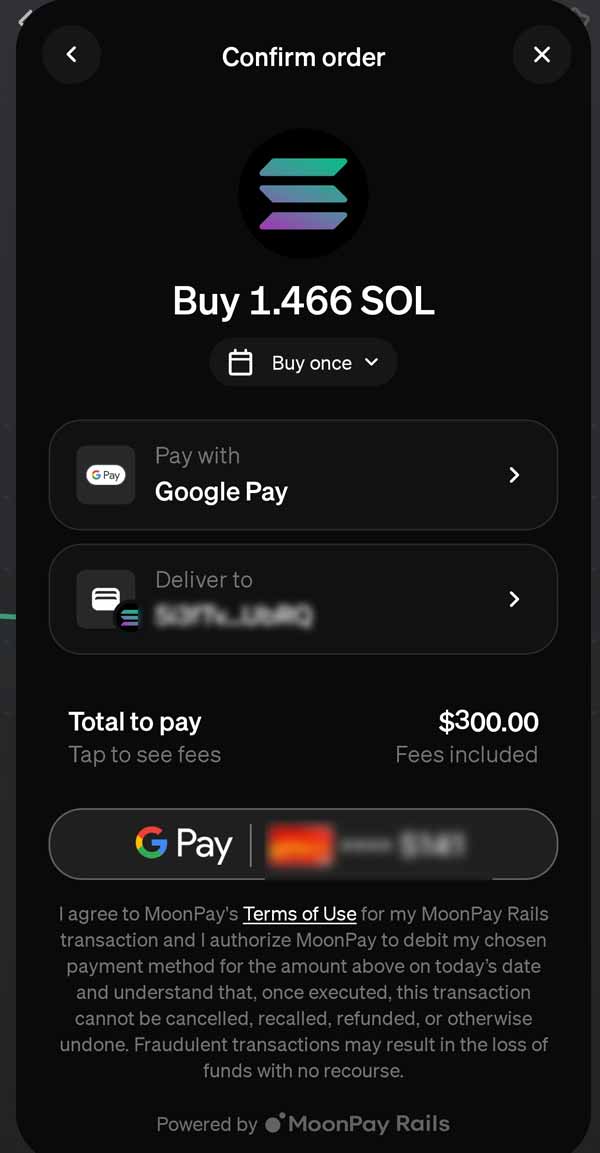
10) With your Solana wallet address now listed as Deliver to, choose your payment option. Use a debit card for instant delivery unless you are fine waiting a few days.
11) Wait a few minutes for funds to transfer before returning to your Exodus wallet to confirm funds are sent
The final step we have been working towards… paying your vendor. Contact your vendor and let them know you will be paying in Sol on Solana and need the appropriate address for their wallet.
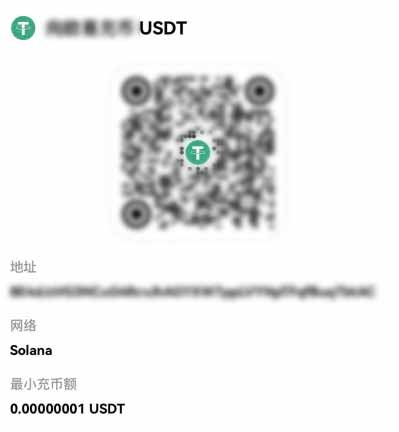
Much like your wallet earlier it will have a long string of numbers and letters you will need to copy and past into your sending address. If they have not, ask your vendor to copy and paste the address for your convenience. DO NOT TRY AND TYPE IT OUT YOURSELF.
If you feel uneasy ask your vendor if you can send a $1 test and have them confirm the delivery. Its much better to send a small amount to be sure then to send the whole amount incorrectly. There is no recovering it if you do.
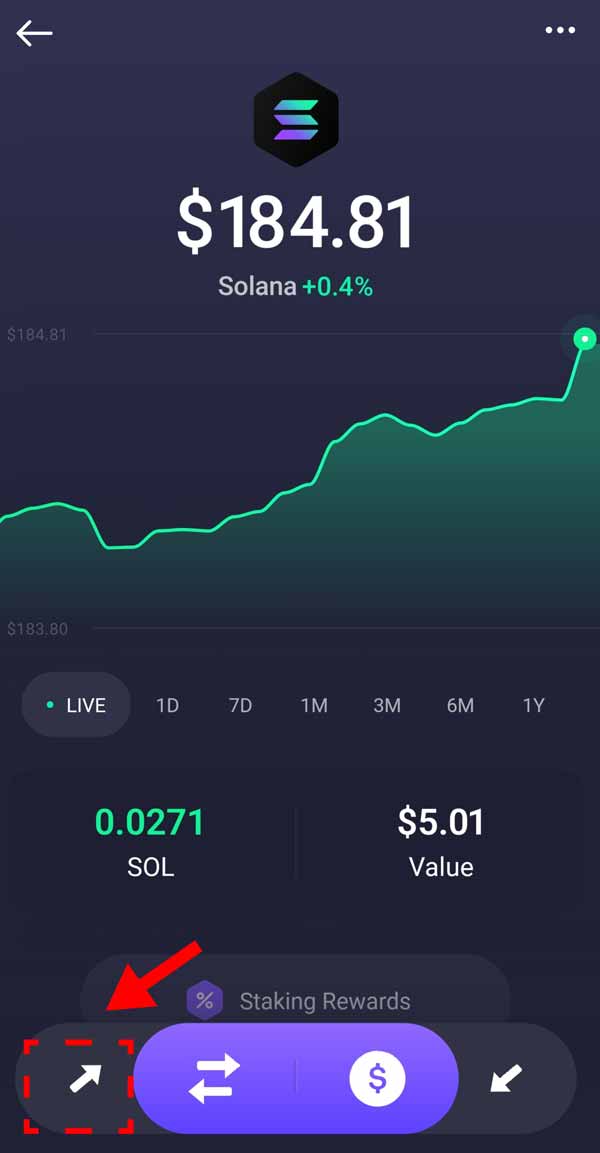
1) From the Solana screen choose Send
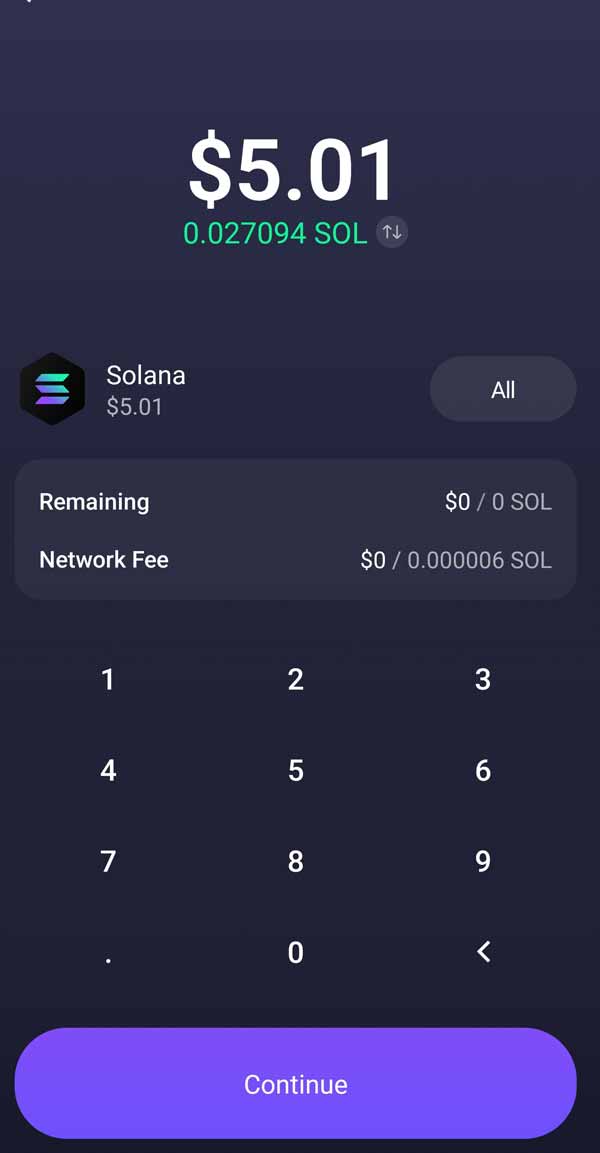
2) Enter the value you wish to send and choose Continue
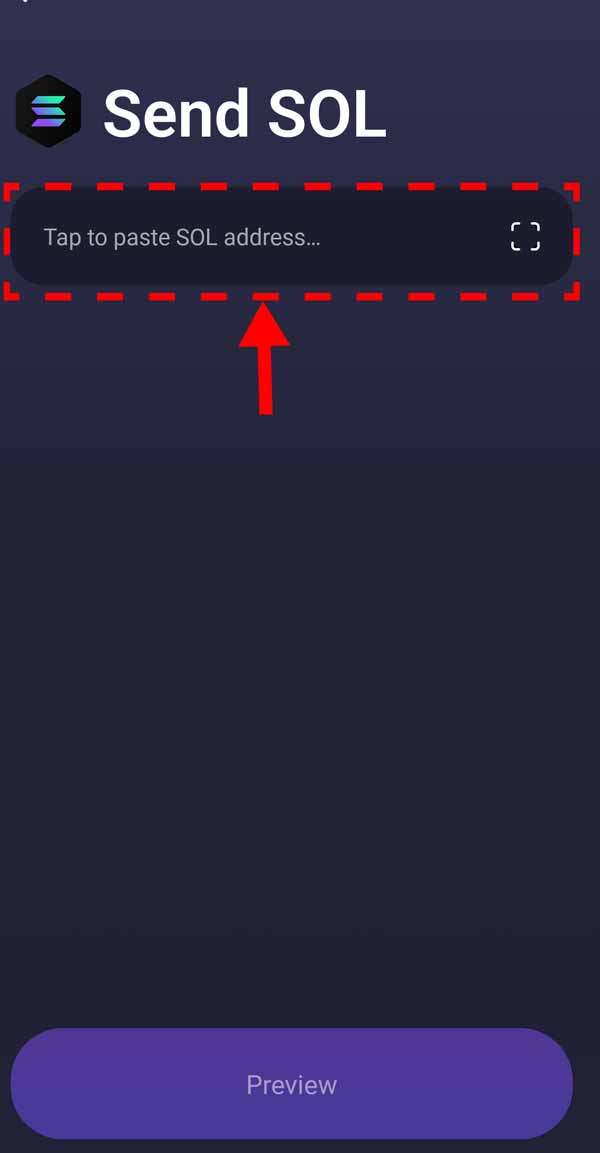
3) Paste the wallet address your vendor sent you
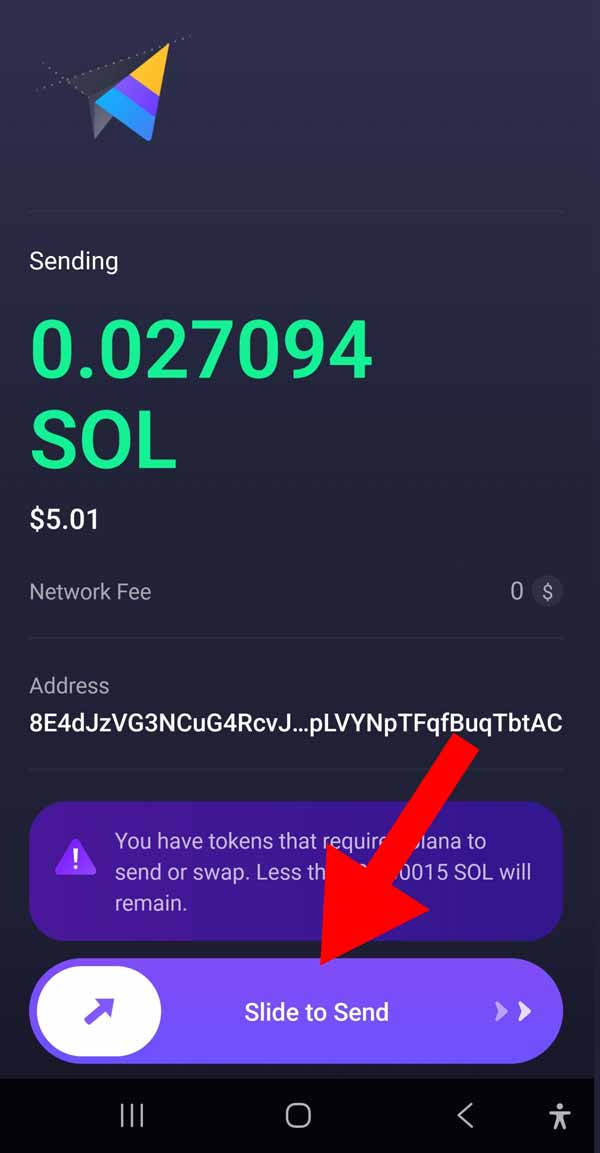
4) Slide to confirm and send
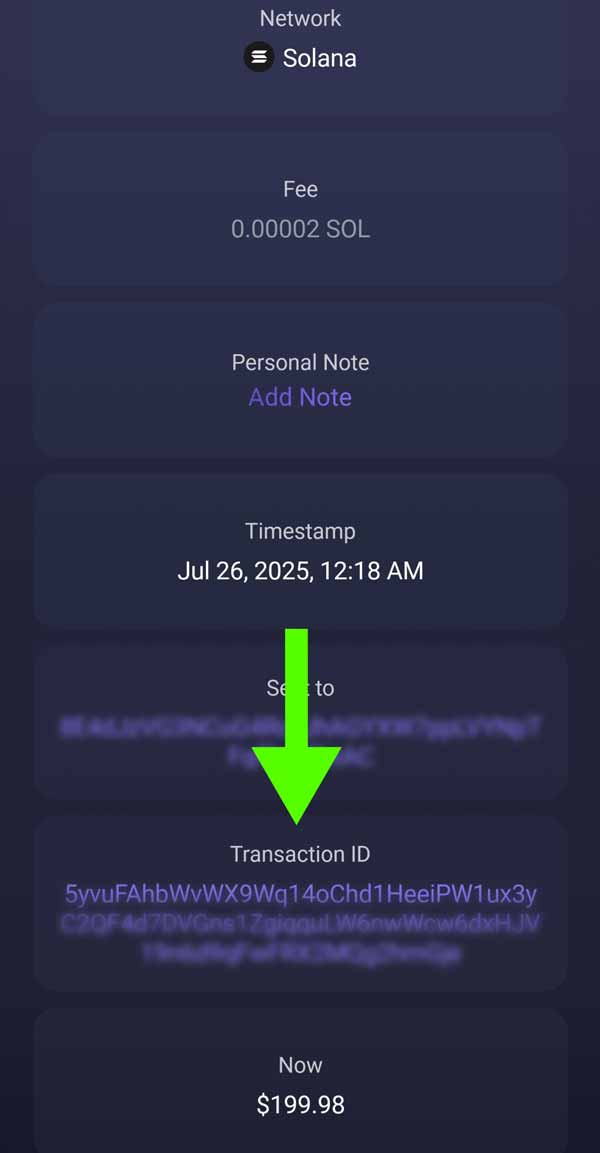
5) Take a screenshot of the confirmation page showing the transaction ID and send this to your vendor

6) Celebrate and give yourself a pat on the back
This site is for educational purposes only.
Papa Porgy is not your lawyer, doctor, accountant, or personal decision-maker.
By continuing, you acknowledge that you are responsible for your own choices.
Please put on your big boy or big girl pants and act accordingly.
Papa Porgy will not be held liable for any outcomes resulting from your actions.